Are you wondering if you can turn your deck into a fun basketball court? Can I put a basketball court on my deck? Yes, you can often add a sport court to your deck for basketball fun. What is a sport court on a deck? It is a special surface, usually made of modular tiles, that sits on top of your existing deck. This creates a safe and good-looking area for playing sports. How hard is it to add a sport court to a deck? It takes some planning and work, but many homeowners can do it. You need to check your deck’s strength and pick the right materials. This guide will show you how to do it step by step.
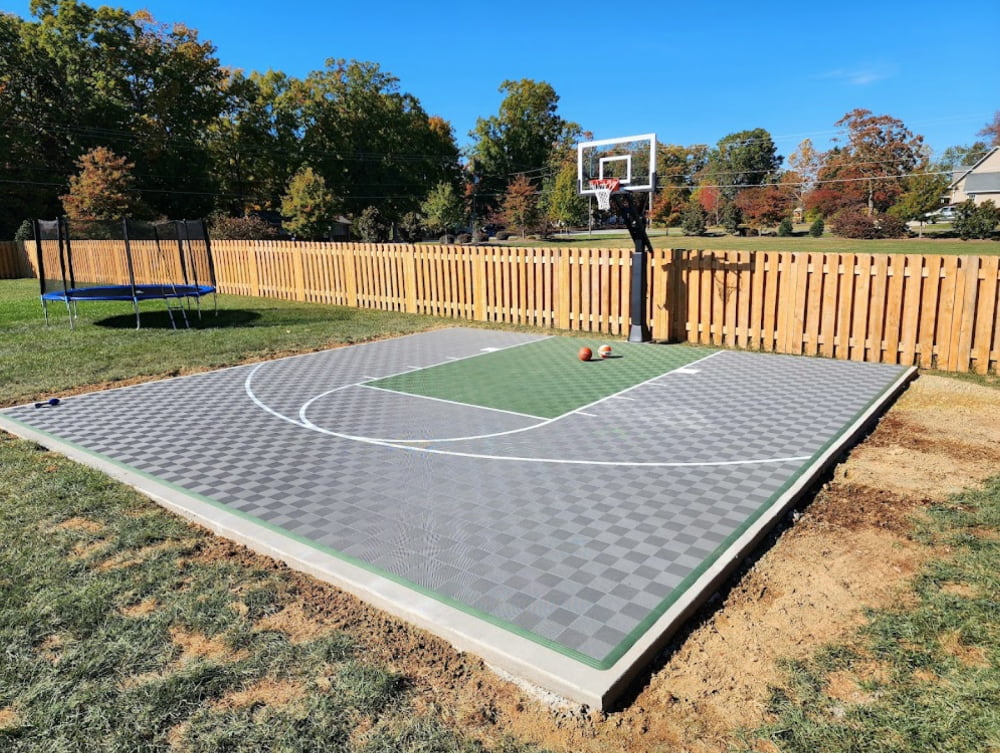
Image Source: modutile.com
Checking Your Deck’s Strength for Basketball
Before you start, you must know if your deck can handle the weight and stress of playing basketball. This is very important for deck structural integrity for basketball. A weak deck can be dangerous.
Why Your Deck’s Strength Matters
Playing basketball means people will jump, run, and move fast. The ball will bounce. A basketball hoop adds weight. All of this puts a lot of stress on your deck. If your deck is not strong enough, it could sag, break, or even collapse. This can cause bad injuries. You want a safe place to play, not a risky one.
Signs of a Strong Deck
A strong deck looks and feels solid. Here are things to look for:
- Firm Feel: The deck does not shake or bounce when you walk on it.
- Good Wood: The wood looks healthy. It has no rot or mold.
- Strong Posts: Support posts are straight and sit on solid ground.
- Tight Connections: All nuts, bolts, and screws are tight. Nothing wobbles.
- Proper Spacing: Joists (the beams under the deck boards) are close enough. They should be 16 to 24 inches apart. This helps share the weight.
- Building Codes: The deck was built to local building rules. A newer deck is more likely to meet these rules.
Signs of a Weak Deck
A weak deck shows signs of trouble. Do not ignore these warnings:
- Wobbly Feel: The deck shakes when people move on it.
- Rotting Wood: You see soft spots, dark areas, or mold. Wood might crumble if you poke it.
- Loose Rails or Stairs: These parts feel loose or move easily.
- Rusty Hardware: Bolts, screws, or nails are rusty. They might be failing.
- Sagging Boards: Deck boards or joists dip in places.
- Cracks: You see big cracks in the wood, especially in beams or posts.
- Old Age: Very old decks might be past their prime. Wood gets weaker over time.
If you see any signs of a weak deck, stop. Do not build a sport court until you fix these problems.
Gauging Deck Load Bearing Capacity for Sports
You need to know how much weight your deck can safely hold. This is the deck load bearing capacity for sports. Standard decks are built to hold people and furniture. Adding a sport court and active players adds more weight.
Speaking with a Professional
The best way to know your deck’s capacity is to ask an expert. A structural engineer or a licensed contractor can inspect your deck. They will look at the wood type, joist size, joist spacing, and how the deck connects to your house. They can tell you if your deck is strong enough or what changes you need. This small cost upfront can save big problems later.
Typical Load Ratings
Most residential decks are built to hold about 40 pounds per square foot. This is for normal use like a party. For a sport court, you need more strength. Active play can create sudden, higher loads. Some experts suggest aiming for at least 60 pounds per square foot for a sport deck. This extra strength gives you a safety buffer.
What Affects Weight Capacity
Many things change how much weight your deck can hold:
- Joist Size: Bigger joists (like 2x10s or 2x12s) hold more weight than smaller ones (like 2x6s).
- Joist Spacing: Joists that are closer together (e.g., 12 inches apart) make the deck stronger than those farther apart (e.g., 24 inches).
- Wood Type: Some woods are stronger than others. Treated lumber is common and durable.
- Deck Age: Older decks might be weaker due to wear, rot, or settling.
- Deck Design: How the deck is built, how many support posts it has, and how it connects to the house all matter.
| Deck Component | Impact on Strength | What to Look For |
|---|---|---|
| Joists | Main support beams. | Size (bigger is better), spacing (closer is better). |
| Beams | Support joists. | Size, condition, number. |
| Posts | Hold up beams. | Straightness, solid base, proper spacing. |
| Ledger Board | Connects deck to house. | Securely bolted to house frame, not just nails. |
| Deck Boards | Top surface. | Condition, thickness, secure fastening. |
Deck Reinforcement for Sport Court
If your deck is not strong enough, you can often make it stronger. This is deck reinforcement for sport court. It makes your deck safer for active play.
Adding Joists
One common way to add strength is to put more joists under the deck. If your current joists are 24 inches apart, adding new ones between them can cut the spacing to 12 inches. This spreads the weight over more beams. It makes the deck much stiffer and stronger.
Adding Beams
Beams run under the joists and are held up by posts. Adding more beams, or making existing ones bigger, can greatly improve strength. This helps carry the weight from the joists down to the posts.
Using Support Posts
Posts hold up the entire deck. If your deck has too few posts, or they are too far apart, you might need to add more. New posts should sit on concrete footings that go below the frost line in your area. This stops them from moving when the ground freezes and thaws.
Material Choices for Reinforcement
- Treated Lumber: This wood resists rot and bugs. It is a good choice for outdoor use.
- Steel Beams: For very heavy loads, steel beams offer great strength but cost more.
- Concrete Footings: Always use concrete under new support posts. This gives a solid, stable base.
Always get advice from a professional before you start any major deck reinforcement. They can make sure your plans are safe and meet local building rules. Do not guess with structural work.
Planning Your Backyard Court Decking Solutions
Once you know your deck is strong enough, it’s time to plan your sport court. This involves picking the right spot, choosing the surface, and planning for drainage and the hoop. These are key parts of backyard court decking solutions.
Picking the Right Space and Layout
Think about how much room you have.
* Measure Your Area: Use a tape measure to find the length and width of your deck.
* Court Size:
* A full basketball court is very big. Most decks are too small.
* A half-court is more common. This needs about 30 feet by 30 feet of clear space.
* For just shooting hoops, even a smaller area, like 15 feet by 15 feet, can work.
* Clearance: Make sure there is enough room around the court. You don’t want players running into walls, fences, or plants. Allow at least a few feet on all sides.
* Sun and Shade: Think about where the sun hits your deck. Do you want shade in the afternoon? Or do you prefer direct sun for drying the court quickly after rain?
Choosing Your Sport Court Surface
For a deck, modular sport court tiles installation on deck is the best choice. These tiles are made to be put on existing surfaces.
Benefits of Modular Sport Court Tiles
- Easy to Install: They snap together like big Lego bricks. No special glue or tools are needed for most types.
- Good for Decks: They let water drain through them. This means water does not sit on your deck boards. This is good for both the tiles and your deck.
- Safe Play: The tiles offer some give, which can be softer on joints than concrete. They also provide good grip.
- Durable: They are made from tough plastics that stand up to weather and heavy use.
- Low Maintenance: Easy to clean.
- Customizable: You can choose different colors to make your court unique. You can even paint lines on them.
- Portable: If you move, you can often take them with you.
Types of Tiles
Most modular tiles are made from polypropylene plastic. But they come in different designs:
- Open Grid Tiles: These have small holes or an open pattern. They are great for drainage. Water goes right through to the deck below.
- Solid Top Tiles: Some tiles have a solid top. These are less common for decks, as they can trap water. Always pick open grid tiles for a deck.
Color Choices
Tiles come in many colors. You can choose colors for the main court and a different color for the border. You can also pick colors for the key and three-point line if you want to paint them on.
Sport Court Drainage on Deck
Good drainage is key for any outdoor court, especially one on a deck. This is sport court drainage on deck.
Why Drainage is Key
- Safety: You do not want a slippery, wet court. Water makes play dangerous.
- Deck Protection: If water sits on your deck boards, they will rot faster. Good drainage keeps your deck dry.
- Tile Life: While tiles are weather-proof, continuous standing water can cause issues over a very long time.
How Modular Tiles Help
Open grid modular tiles are designed for drainage. Water goes through the holes and down to the deck boards. The small gaps between the tiles also let water pass. The deck boards themselves should have small gaps already for drainage. This system works well together.
Deck Slope
Most decks have a slight slope away from the house. This helps water run off. This natural slope is usually fine for your sport court tiles. If your deck has dips where water collects, you might need to fix those spots before laying tiles.
Basketball Hoop Mounting on Deck
How you put up your basketball hoop is important for safety and play. This is basketball hoop mounting on deck.
Portable Hoops
These hoops have a base that you fill with water or sand. They are the easiest option.
* Pros: No deck changes needed. You can move them around.
* Cons: They can tip over if not weighted well. Players can run into the base. They might not be as stable as a fixed hoop.
* Safety Tip: Always fill the base completely. Place it far enough from the court so players don’t trip.
Wall-Mounted Hoops (Deck-Attached)
Some hoops mount directly to a wall, like your house wall or a strong deck post.
* Pros: Very stable. Saves space on the deck.
* Cons: Needs a very strong wall or post. May require extra reinforcement for the wall structure. Not all houses or decks can handle this. You need to make sure it’s bolted into studs or main beams, not just deck boards.
* Safety Tip: Get a professional to install this type. It must be very secure to prevent it from falling.
In-Ground Hoops (Not Ideal for Deck)
These hoops have a pole set into concrete in the ground.
* Pros: Extremely stable and strong.
* Cons: You cannot put an in-ground hoop on your deck. The pole must go into the ground next to the deck. This might be an option if your court extends past the deck edge.
* Safety Tip: If you use an in-ground hoop next to the deck, make sure the deck edge is safe and padded.
For most deck-based courts, a well-weighted portable hoop or a carefully installed wall-mounted hoop is the best choice.
Deck Basketball Court Construction Tips: Step-by-Step Installation
Once your deck is strong and you have your materials, it’s time to build! These deck basketball court construction tips will guide you.
Deck Surface Preparation for Court
Getting the deck ready is the first step for a smooth outdoor basketball court over wood deck.
- Clean the Deck: Sweep off all dirt, leaves, and debris. Use a power washer on a low setting or a stiff brush with deck cleaner to remove grime, mold, and mildew. Let the deck dry completely.
- Make Repairs: Check for any loose deck boards. Tighten screws or replace nails with screws. Sand down any rough spots or splinters. If you have any rotten boards, replace them.
- Leveling (Minor): Modular tiles need a fairly flat surface. If your deck has small dips, you might be able to fill them with shims or a self-leveling compound for decks. For major unevenness, you need to fix the deck structure first.
- Paint or Seal (Optional but Good): You can paint or seal your deck before installing tiles. This extra layer of protection helps preserve your deck boards. Make sure the paint or sealer is fully dry and cured before laying tiles.
Modular Sport Court Tiles Installation on Deck
This is where your court takes shape! This is about modular sport court tiles installation on deck.
- Tools You Will Need:
- Rubber mallet (for gently tapping tiles)
- Tape measure
- Chalk line
- Utility knife or jigsaw (for cutting tiles)
- Safety glasses
- Gloves
- Starting Point:
- Most pros suggest starting in a corner of your deck. Pick the corner that is squarest and closest to your desired hoop location.
- Lay out a few rows without snapping them together first. This helps you check how the tiles will fit.
- Snapping Tiles Together:
- Each tile has loops on two sides and pegs on the other two.
- Align the pegs of one tile with the loops of another.
- Step on the seam or gently tap with a rubber mallet until they click firmly into place. They should be snug.
- Work in one direction, row by row. This ensures the court stays square.
- Cutting Tiles for Edges:
- When you reach the edge of your deck, you will likely need to cut tiles.
- Measure the space you need to fill.
- Mark the tile with a chalk line or marker.
- Use a sturdy utility knife to score the plastic many times along the line. Then snap it. For more complex cuts, a jigsaw works well. Wear safety glasses!
- Adding Edging Pieces:
- Many tile systems offer sloped edging pieces. These click onto the exposed edges of the court.
- They create a smooth transition from the deck to the court. This looks better and prevents tripping.
Outdoor Basketball Court Over Wood Deck Specifics
When installing an outdoor basketball court over wood deck, keep these unique points in mind.
- Ventilation Under Tiles:
- Modular tiles are designed with an open structure. This is important.
- It allows air to flow between the tiles and your deck boards. This helps keep moisture from getting trapped.
- Good airflow prevents mold, mildew, and rot on your deck.
- Expansion and Contraction:
- Plastic tiles, like your deck boards, will expand in heat and shrink in cold.
- Most modular tile systems account for this. They are designed to “float” a little.
- Leave a small gap (about 1/2 inch) between the edge of your tile court and any fixed objects like walls or railings. This gives the court room to move.
- Protecting the Deck Below:
- While tiles offer protection, sharp objects or heavy impacts could still hurt your deck.
- Keep the area under the court clean. Remove debris that might hold moisture.
- Regularly check under the tiles if possible (e.g., when cleaning the deck boards).
| Installation Step | Key Action | Why It Matters |
|---|---|---|
| Deck Prep | Clean, repair, level. | Ensures a stable, long-lasting base. |
| Start Point | Pick square corner. | Keeps court straight and square. |
| Snap Together | Firmly connect tiles. | Creates a solid, playable surface. |
| Cutting Tiles | Measure, mark, cut. | For a neat fit at edges. |
| Edging | Add sloped pieces. | Safety, appearance, prevents trips. |
| Gaps | Leave room at edges. | Allows for tile expansion/contraction. |
Maintaining Your Deck Sport Court
Taking care of your new court and deck will help them last a long time.
Regular Cleaning
- Sweep Often: Use a broom or leaf blower to clear leaves, dirt, and debris. This stops things from getting stuck in the tile holes.
- Hose Down: Use a garden hose to rinse the court. A soft brush can help with stubborn spots.
- Mild Soap: For tougher dirt, use a mild soap and water solution. Do not use harsh chemicals, as they might damage the tiles or the deck below.
Checking for Wear
- Inspect Tiles: Look for any cracked, broken, or loose tiles. Replace them quickly.
- Check Seams: Make sure tiles are still tightly snapped together. If they separate, gently tap them back in place with a rubber mallet.
- Look at Lines: If you painted lines, check for fading or chipping. Touch them up as needed.
Winter Care
- Clear Snow: Remove snow from the court. Do not use metal shovels, as they can scratch the tiles. Plastic shovels are better.
- Avoid Salt: Do not use rock salt or ice melt on your tiles. It can damage the plastic and also the wood deck below. A bit of sand can help with grip if needed.
- Consider Covering: In very harsh winters, a tarp or court cover can offer extra protection.
Deck Inspection
Remember, the sport court is on your deck. Keep checking the deck itself.
* Look Underneath: Every year, look at the joists, beams, and posts of your deck. Check for any new signs of rot, loose connections, or sagging.
* Clean Under Tiles: Once a year, if possible, remove a few tiles in different spots. Clean any debris that might have gathered under them. Check the deck boards for moisture or wear.
Safety First Considerations
Playing sports involves movement, so safety is always important.
- Adult Supervision: Always have an adult watch kids playing.
- Proper Footwear: Players should wear athletic shoes with good grip. No bare feet or slippery shoes.
- Clear Playing Area: Keep the court free of toys, furniture, or anything else that could cause a trip.
- Regular Checks: Before each play session, quickly check the court for any hazards. Look for loose tiles or objects.
- Hoop Stability: If you have a portable hoop, check its base weight regularly. If it’s a wall-mounted hoop, check its mounting bolts.
Frequently Asked Questions (FAQ)
Can I use a permanent hoop set into the ground next to my deck court?
Yes, if you have space next to your deck, an in-ground hoop is the most stable choice. Just make sure the court surface on the deck blends safely with the ground area around the hoop.
How much does it cost to add a sport court to a deck?
The cost changes based on court size, tile type, and if you need deck repairs or reinforcement. Modular tiles usually cost $3 to $6 per square foot. Hoops vary from $100 for portable ones to over $1,000 for high-quality wall-mounted or in-ground types. Deck reinforcement can add $500 to several thousand dollars.
How long do modular sport court tiles last?
Good quality modular tiles often come with a 10-15 year warranty. With proper care, they can last even longer. They are built to withstand sun, rain, and play.
Can I play on my deck sport court in the rain?
Modular tiles are designed to drain quickly. They offer good grip even when wet. However, any wet surface can be slippery. Always use caution and good judgment when playing in the rain. Stop playing if the court feels too slick.
Do I need a building permit for this project?
You might need a permit, especially if you do major deck reinforcement. Always check with your local building department before starting any structural work or adding large structures to your deck. It is always better to be safe and follow local rules.